Building a Telegram Clone with Next.js and TailwindCSS - Part One

Dev in the Tropics | Software Engineer
Building a chat app from scratch can seem overwhelming, but with the right tools, it’s a lot more approachable than you might think.
In this three-part series, we’ll walk through building a Telegram Web clone using Next.js, TailwindCSS, and Stream SDKs. In this first part, we’ll set up the tools we need for the project, add authentication, and build the app’s layout using TailwindCSS.
In the second part, we’ll focus on building the chat section of our UI and adding real-time messaging using Stream React Chat SDK. Finally, in part three, we’ll add video/audio calls to the app using Stream React Video and Audio SDK.
By the end of this series, you’ll have a solid understanding of how modern chat apps work, along with a fully functional project to build on.
Here’s a sneak peek of the final product:
You can check out the live demo and GitHub repository to get the full code.
Let’s get started!
Prerequisites
Before we begin, make sure you're familiar with the following concepts to get the most out of this guide:
React Fundamentals: You should understand how to build components, manage state, and work with React’s component-based architecture.
Node.js & npm: Ensure you have Node.js and npm installed, as they are essential for running and building our project.
TypeScript, Next.js & TailwindCSS Basics: We’ll be using these technologies extensively, so having a basic grasp of them will make it easier to follow along.
Setting Up the Project
Let’s begin by setting up the project. We’ll use a starter template containing all the boilerplate code we need to get started.
To clone the starter template, run the following commands:
git clone https://github.com/TropicolX/telegram-clone.git
cd telegram-clone
git checkout starter
npm install
The project structure should look like the image below:

This template contains our Next.js setup with TypeScript and TailwindCSS pre-configured. It also comes with other basic modules and directories that we’ll be using for this tutorial, including:
components: This is where we’ll keep all our reusable components.hooks: This folder will contain all our custom React hooks.lib: This folder contains theutils.tsfile, which we use to store utility functions.
User Authentication with Clerk
Telegram Web requires users to be signed in to access the application, so we’ll do the same with our clone by adding authentication. We’ll use Clerk to achieve this for our app.
What is Clerk?
Clerk is a platform for managing users. It provides various tools for authentication and user profiles like UI components, APIs, and a dashboard for administrators.
This tool will make adding authentication features to our Telegram clone much more straightforward.
Setting Up a Clerk Account
To get started with Clerk, you must first create an account on their website. Navigate to Clerk’s sign-up page and sign up using your email or a social login option.
Creating a Clerk Project

Once you sign in, you’ll need to create a project for your app. You can do this by following the steps below:
Go to the dashboard and click "Create application".
Name your application “Telegram clone”.
Under “Sign in options,” select Email, Username, and Google.
Click "Create application" to complete the setup.
Once the project is created, you'll access the application overview page. Here, you will find your Publishable Key and Secret Key—save these, as they will be useful later.
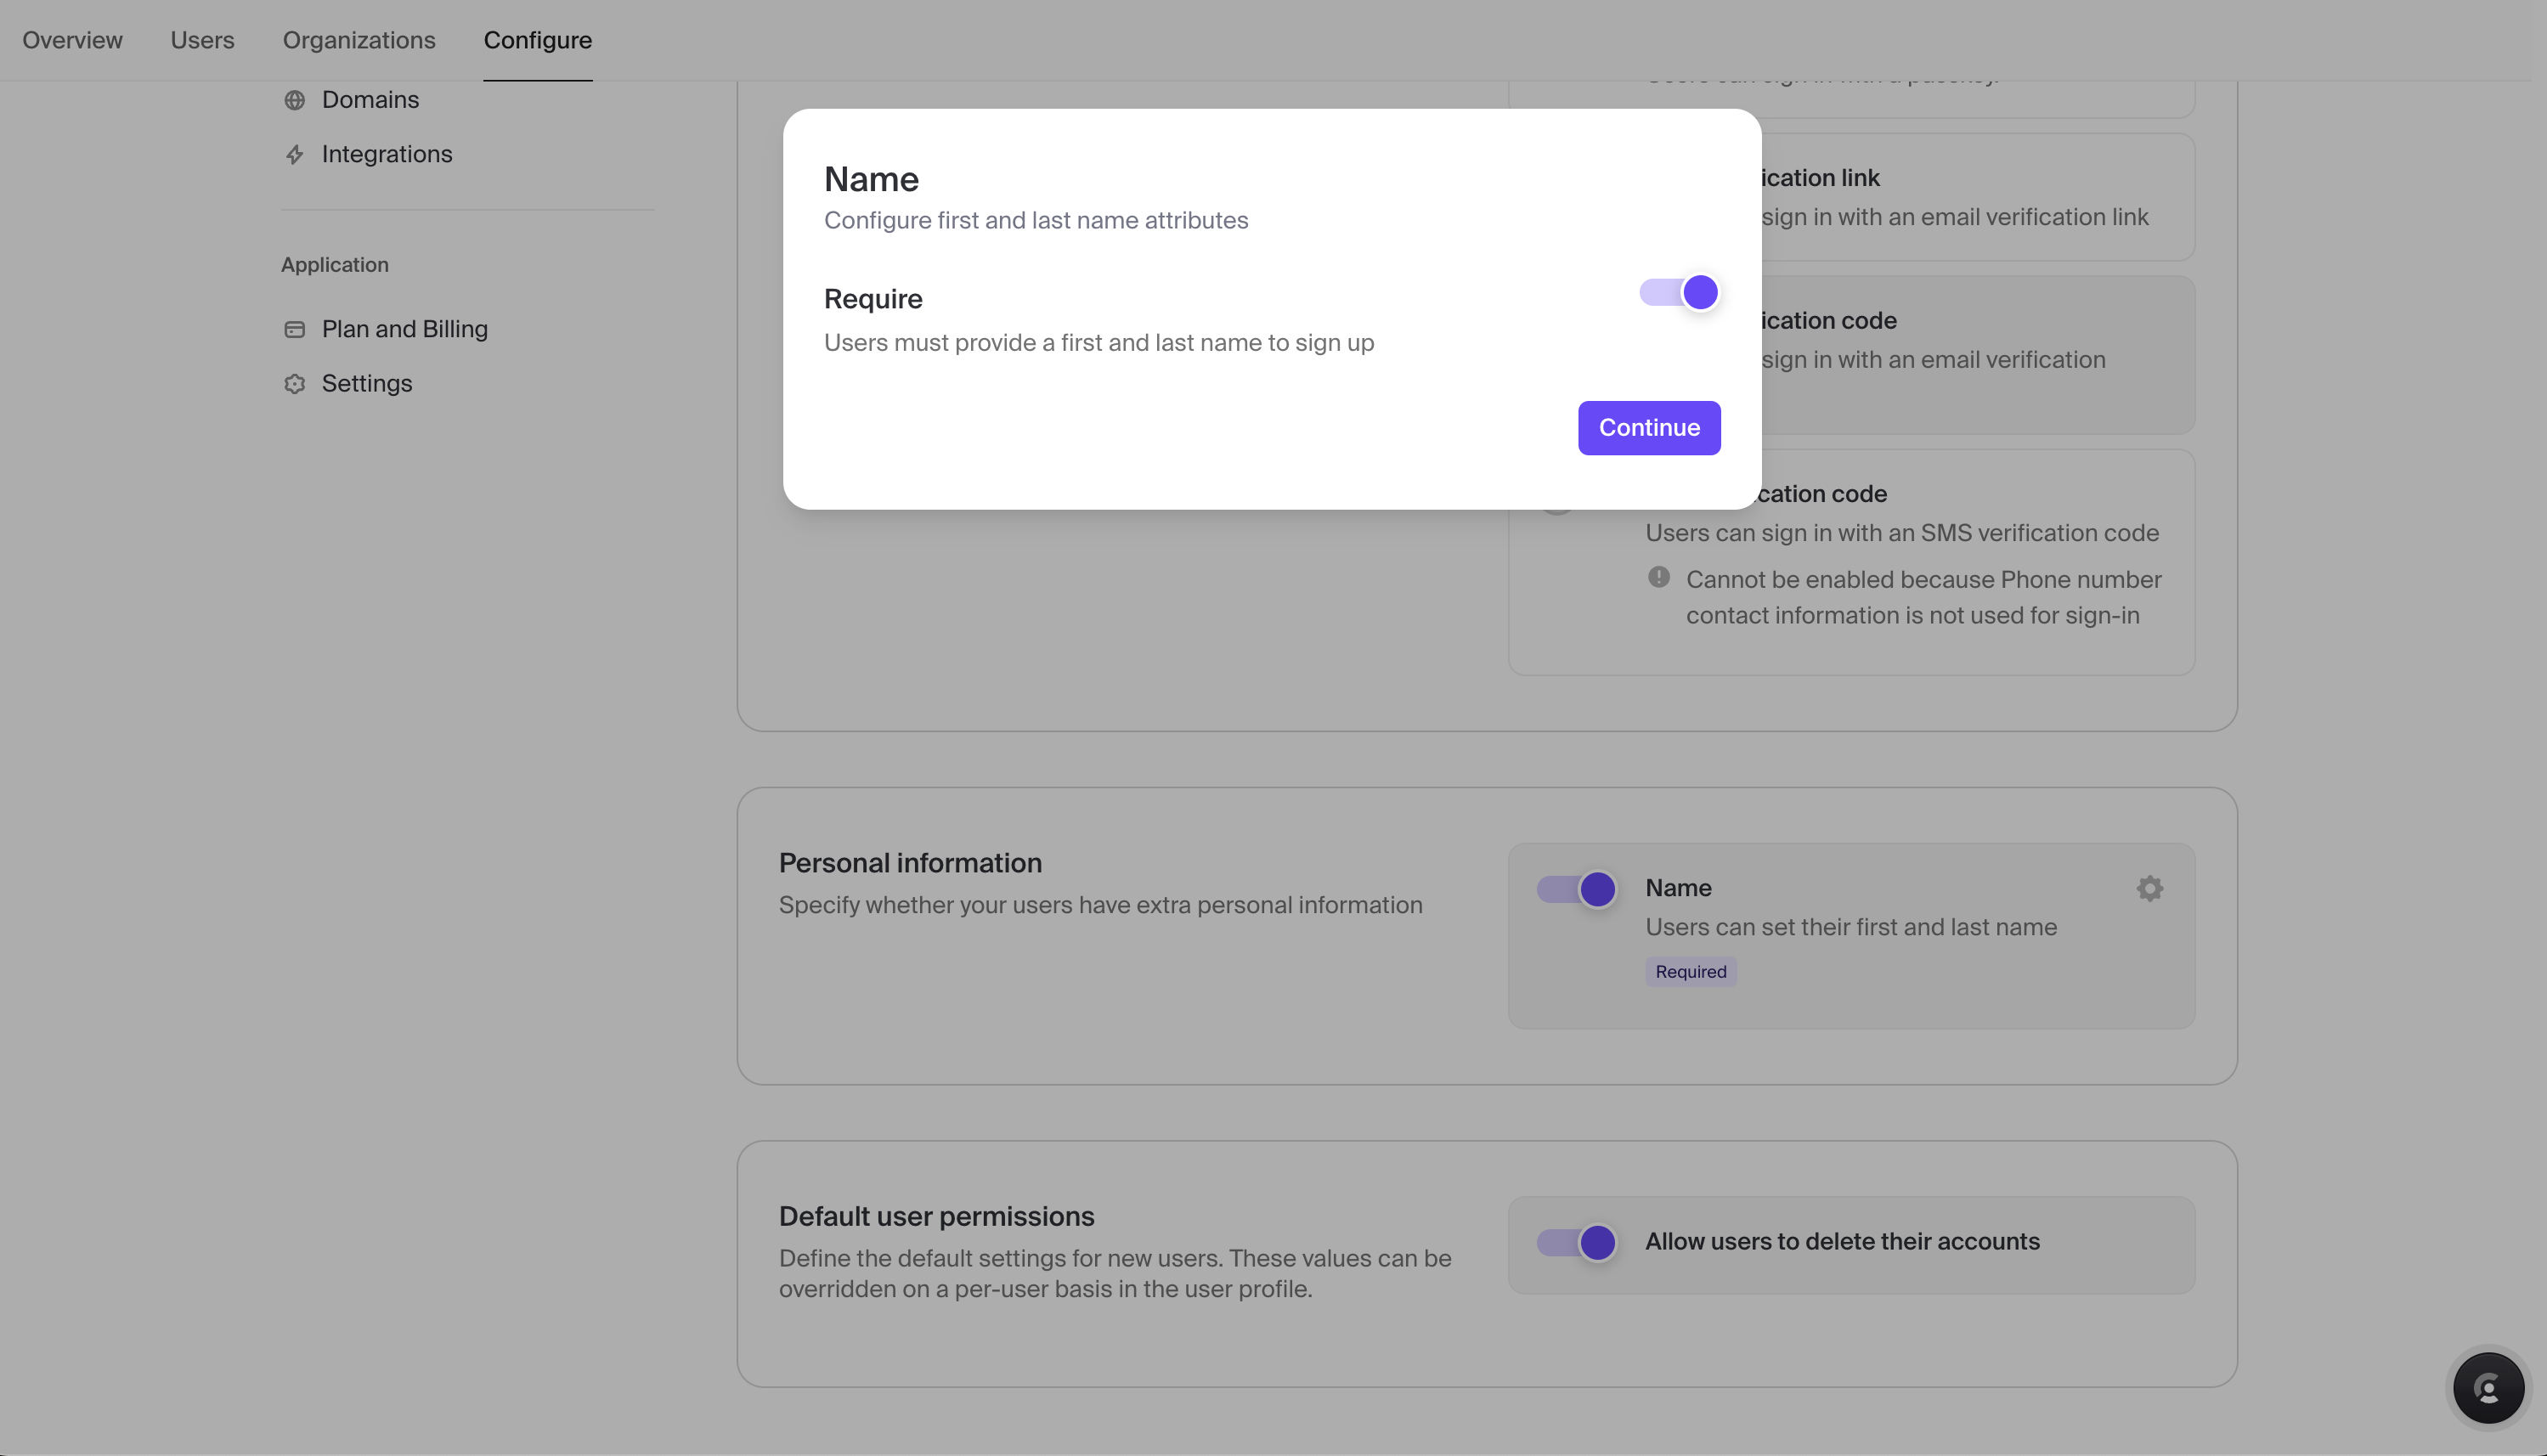
Next, we need to ensure users provide a first and last name during the sign-up process, similar to Telegram. Follow the steps below to enable this feature:
Go to your dashboard's "Configure" tab.
Locate the "Name" option in the "Personal Information" section and toggle it on.
Click the gear icon next to the "Name" field and set it as required.
Click “Continue” to save the changes.
Installing Clerk in Your Project
Next, let's install Clerk into your Next.js project:
Install Clerk’s Next.js SDK by running the following command:
npm install @clerk/nextjsCreate a
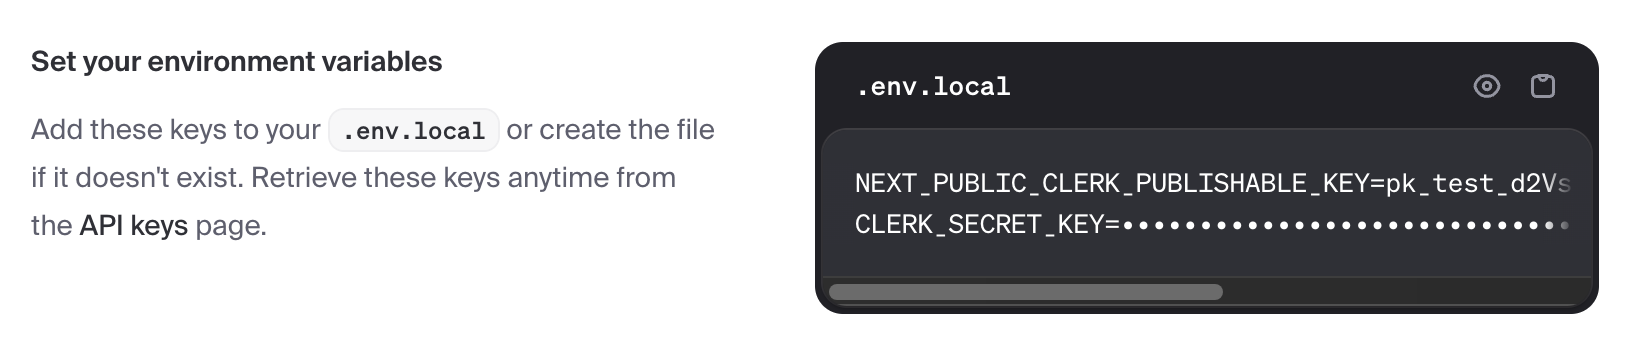
.env.localfile in the root of your project and add the following environment variables:NEXT_PUBLIC_CLERK_PUBLISHABLE_KEY=your_clerk_publishable_key CLERK_SECRET_KEY=your_clerk_secret_keyReplace
your_clerk_publishable_keyandyour_clerk_secret_keywith the keys from your Clerk project's overview page.To get the user and authentication data throughout our app, we need to wrap our main layout with the Clerk’s
<ClerkProvider />component.Navigate to the
app/layout.tsxfile and update it with the following code:import type { Metadata } from 'next'; import { ClerkProvider } from '@clerk/nextjs'; ... export default function RootLayout({ children, }: Readonly<{ children: React.ReactNode; }>) { return ( <ClerkProvider> <html lang="en"> <body className="h-svh w-svw lg:h-screen lg:w-screen antialiased text-color-text select-none overflow-hidden"> {children} </body> </html> </ClerkProvider> ); }
Creating Sign-Up and Sign-In Pages
Next, we need to create the sign-up and sign-in pages for our Telegram clone. To do this, we’ll use Clerk's <SignUp /> and <SignIn /> components. These components come with all the UI and authentication logic we’ll need.
Follow the steps below to add the pages to your app:
Configure The Authentication URLs: Clerk's
<SignUp />and<SignIn />components need to know where they're mounted in your app. We can provide these paths via environment variables. Add these routes to your.env.localfile:NEXT_PUBLIC_CLERK_SIGN_IN_URL=/sign-in NEXT_PUBLIC_CLERK_SIGN_UP_URL=/sign-upCreate the Sign-Up Page: Create a file at
app/sign-up/[[...sign-up]]/page.tsx, and add the following code:import { SignUp } from '@clerk/nextjs'; export default function Page() { return ( <div className="sm:w-svw sm:h-svh py-4 bg-background w-full h-full flex items-center justify-center"> <SignUp /> </div> ); }Create the Sign-In Page: Create a
page.tsxfile in anapp/sign-in/[[...sign-in]]folder with the following code:import { SignIn } from '@clerk/nextjs'; export default function Page() { return ( <div className="w-svw h-svh bg-background flex items-center justify-center"> <SignIn /> </div> ); }Add Your Clerk Middleware: Next, we need to create a middleware helper to configure our protected routes. We want only the sign-up and sign-in routes to be accessible to everyone while protecting the other routes. To achieve this, create a
middleware.tsfile in thesrcdirectory with the following code:import { clerkMiddleware, createRouteMatcher } from '@clerk/nextjs/server'; const isPublicRoute = createRouteMatcher(['/sign-in(.*)', '/sign-up(.*)']); export default clerkMiddleware(async (auth, request) => { if (!isPublicRoute(request)) { await auth.protect(); } }); export const config = { matcher: [ // Skip Next.js internals and all static files, unless found in search params '/((?!_next|[^?]*\\.(?:html?|css|js(?!on)|jpe?g|webp|png|gif|svg|ttf|woff2?|ico|csv|docx?|xlsx?|zip|webmanifest)).*)', // Always run for API routes '/(api|trpc)(.*)', ], };

Once these steps are complete, Clerk should be integrated into your app along with the sign-in and sign-up pages.
Setting Up Stream
What is Stream?
Stream is a platform that enables developers to integrate advanced chat and video functionalities into their applications. Rather than facing the challenges of building chat and video features from scratch, Stream offers APIs and SDKs that help build these features quickly and easily.
We'll use Stream's React SDK for Video and React Chat SDK to build the chat and video calling features in our Telegram clone.
Creating your Stream Account
Let’s get started by creating a Stream account:
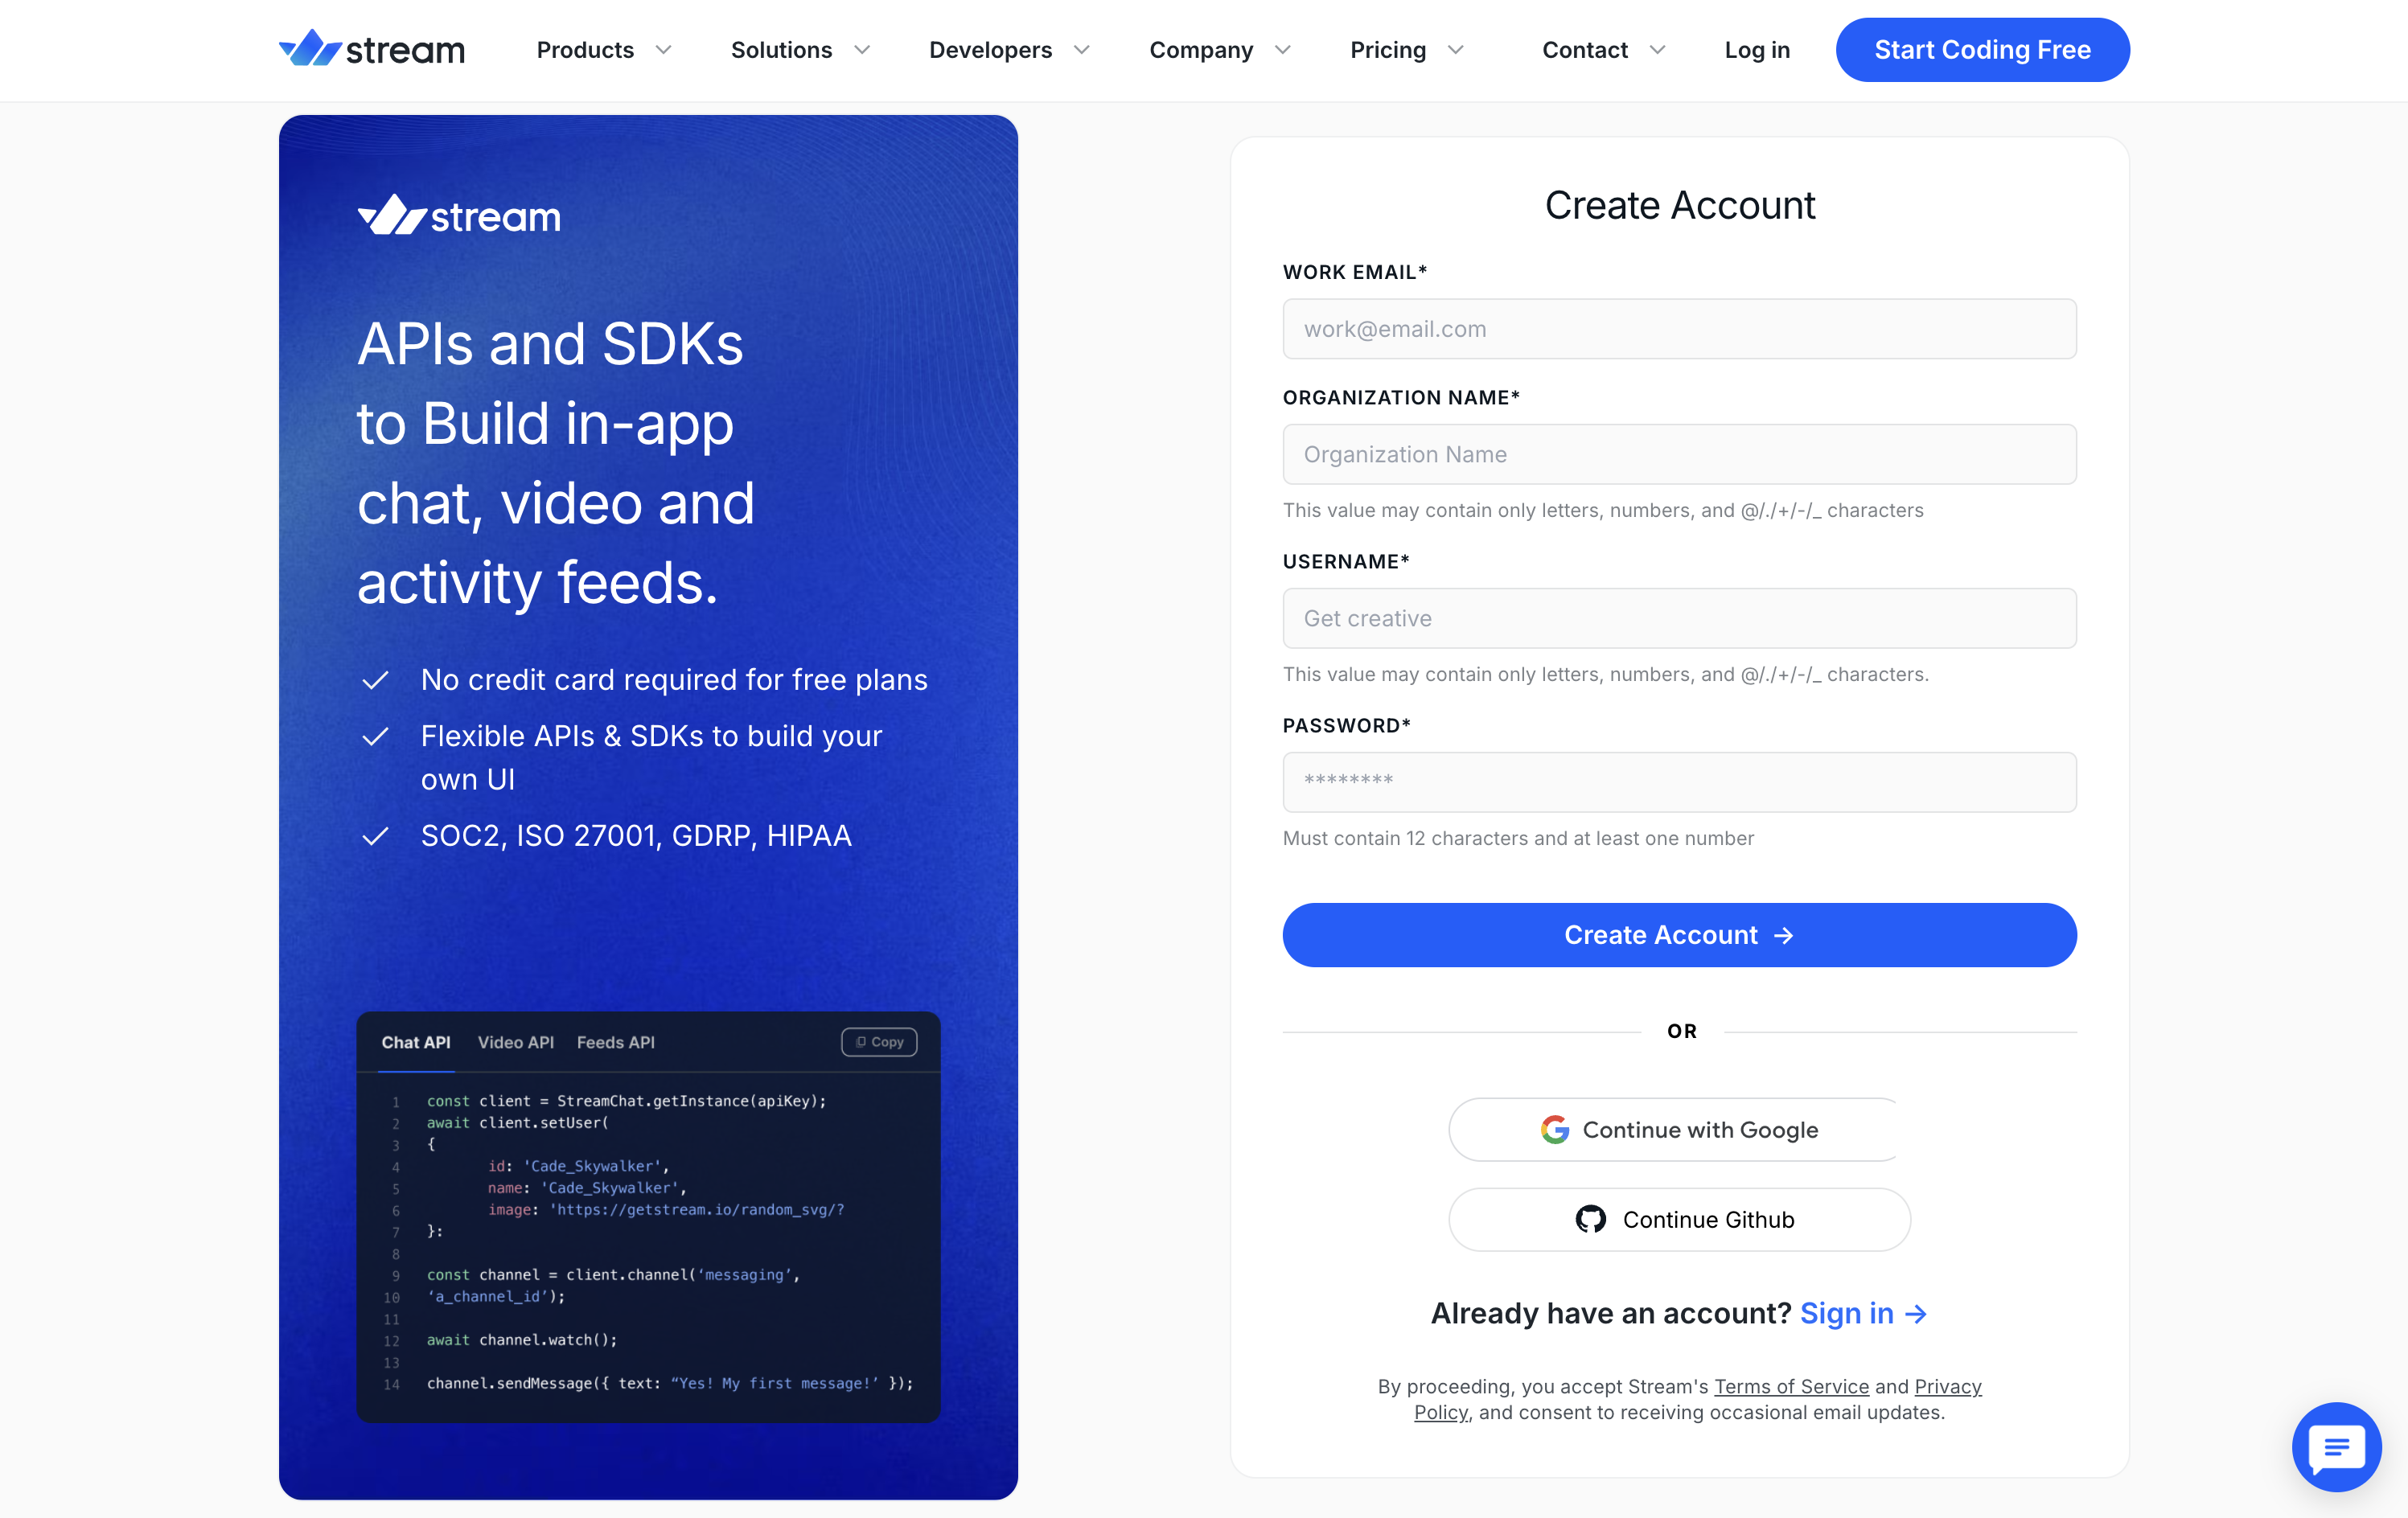
Sign Up: Navigate to the Stream sign-up page and create a new account using your email or a social login.
Complete Your Profile:
Once you sign up, you'll be requested to provide additional information, such as your role and industry.
Select the "Chat Messaging" and "Video and Audio" options, as we need these tools for our app.
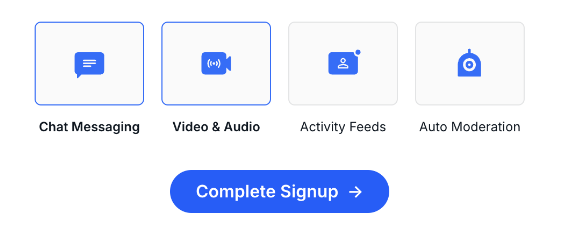
Finally, click "Complete Signup" to continue.
After completing the steps above, you will be redirected to your Stream dashboard.
Creating a New Stream Project

Next, you need to set up a Stream app for your project:
Create a New App: In your Stream dashboard, click "Create App" in the top right corner.
Configure Your App:
App Name: Enter a name like "the-telegram-clone" or any other name of your choice.
Region: Select the region nearest to you for the best performance.
Environment: Leave it set to "Development".
Click the "Create App" button to finish.
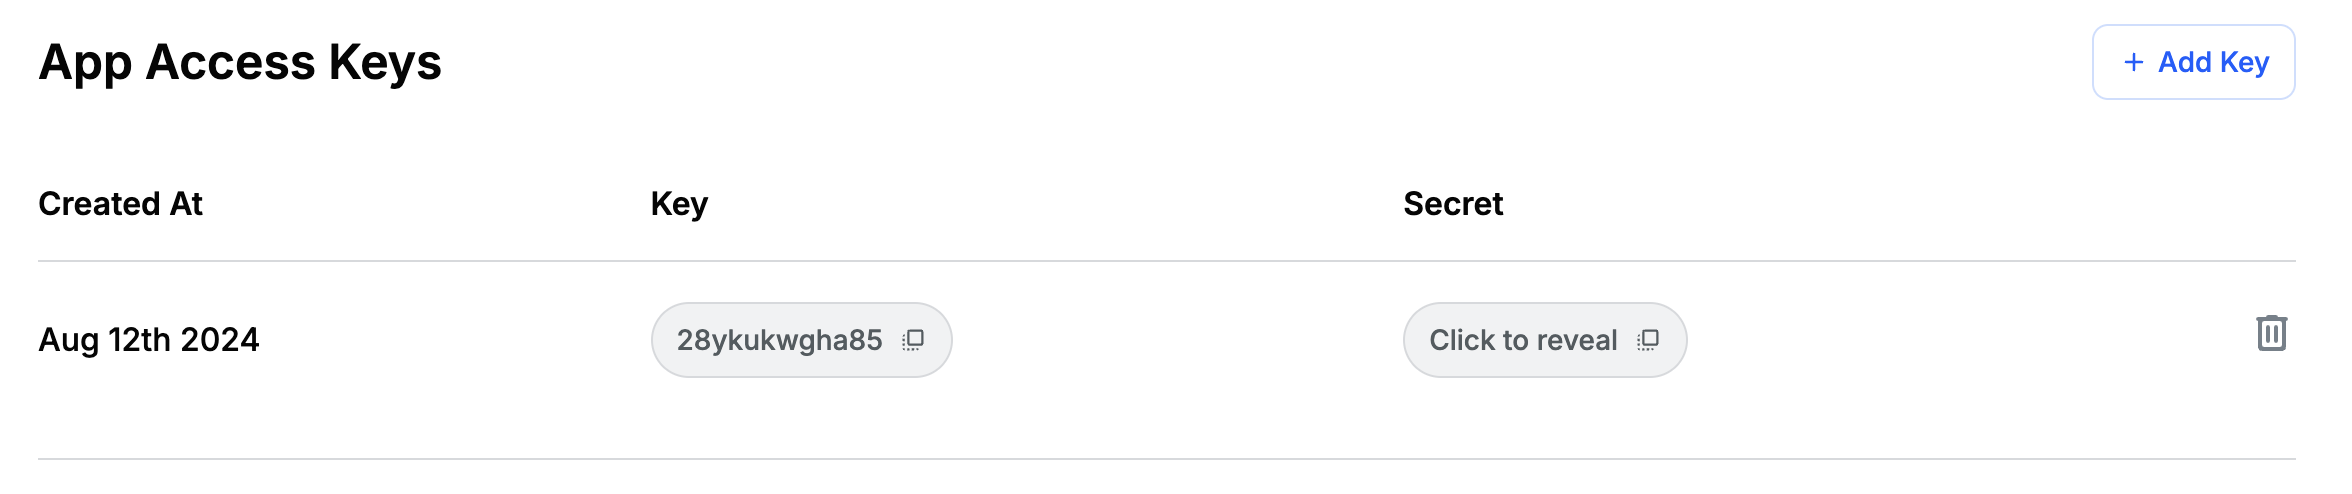
Get Your API Keys: After you create the app, navigate to the "App Access Keys" section. You’ll need these keys to connect Stream to your project.
Installing Stream SDKs
To begin using Stream in our Next.js project, we need to install several SDKs:
Install Stream SDKs: Run the following command to install the necessary packages:
npm install @stream-io/node-sdk @stream-io/video-react-sdk stream-chat-react stream-chatAdd Stream App Keys: Add your Stream API keys to your
.env.localfile:NEXT_PUBLIC_STREAM_API_KEY=your_stream_api_key STREAM_API_SECRET=your_stream_api_secretReplace
your_stream_api_keyandyour_stream_api_secretwith the keys from the “App Access Keys” section in your Stream dashboard.Import the Stylesheets: Stream's
@stream-io/video-react-sdkandstream-chat-reactpackages include CSS stylesheets for their components. Import the@stream-io/video-react-sdkcss into yourapp/layout.tsxfile:... import '@stream-io/video-react-sdk/dist/css/styles.css'; import './globals.scss'; ...Next, import
stream-chat-reactstyles into yourglobals.scssfile:... @import "~stream-chat-react/dist/scss/v2/index.scss"; ...
Creating the Initial Layout

With Clerk and Stream installed, let’s create the main application page for our Telegram clone.
We’ll start by building the main layout of our app. This layout will include the setup we need to provide Stream’s chat and video data to the rest of our app. It will also feature a sidebar, which we’ll use to display the user's most recent chats.
Create an a folder in the app directory, and then add a layout.tsx file with the following code:
'use client';
import { ReactNode, useEffect, useState } from 'react';
import { useParams } from 'next/navigation';
import { useUser } from '@clerk/nextjs';
import { StreamChat } from 'stream-chat';
import { Chat } from 'stream-chat-react';
import { StreamVideo, StreamVideoClient } from '@stream-io/video-react-sdk';
import clsx from 'clsx';

interface LayoutProps {
  children?: ReactNode;
}

const tokenProvider = async (userId: string) => {
  const response = await fetch('/api/token', {
    method: 'POST',
    headers: {
      'Content-Type': 'application/json',
    },
    body: JSON.stringify({ userId: userId }),
  });
  const data = await response.json();
  return data.token;
};

const API_KEY = process.env.NEXT_PUBLIC_STREAM_API_KEY as string;

export const [minWidth, defaultWidth, defaultMaxWidth] = [256, 420, 424];

export default function Layout({ children }: LayoutProps) {
  const { user } = useUser();
  const { channelId } = useParams<{ channelId?: string }>();

  const [loading, setLoading] = useState(true);
  const [chatClient, setChatClient] = useState<StreamChat>();
  const [videoClient, setVideoClient] = useState<StreamVideoClient>();
  const [sidebarWidth, setSidebarWidth] = useState(0);

  useEffect(() => {
    const savedWidth =
      parseInt(localStorage.getItem('sidebarWidth') as string) || defaultWidth;
    localStorage.setItem('sidebarWidth', String(savedWidth));
    setSidebarWidth(savedWidth);
  }, []);

  useEffect(() => {
    const customProvider = async () => {
      const token = await tokenProvider(user!.id);
      return token;
    };

    const setUpChatAndVideo = async () => {
      const chatClient = StreamChat.getInstance(API_KEY);
      const clerkUser = user!;
      const chatUser = {
        id: clerkUser.id,
        name: clerkUser.fullName!,
        image: clerkUser.hasImage ? clerkUser.imageUrl : undefined,
        custom: {
          username: clerkUser.username,
        },
      };

      if (!chatClient.user) {
        await chatClient.connectUser(chatUser, customProvider);
      }

      setChatClient(chatClient);
      const videoClient = StreamVideoClient.getOrCreateInstance({
        apiKey: API_KEY,
        user: chatUser,
        tokenProvider: customProvider,
      });
      setVideoClient(videoClient);
      setLoading(false);
    };

    if (user) setUpChatAndVideo();
  }, [user, videoClient, chatClient]);

  if (loading)
    return (
      <div className="flex h-full w-full">
        <div
          style={{
            width: `${sidebarWidth || defaultWidth}px`,
          }}
          className="bg-background h-full flex-shrink-0 relative"
        ></div>
        <div className="relative flex flex-col items-center w-full h-full overflow-hidden border-l border-solid border-l-color-borders">
          <div className="chat-background absolute top-0 left-0 w-full h-full -z-10 overflow-hidden bg-theme-background"></div>
        </div>
      </div>
    );

  return (
    <Chat client={chatClient!}>
      <StreamVideo client={videoClient!}>
        <div className="flex h-full w-full">
          <div
            className={clsx(
              'fixed max-w-none left-0 right-0 top-0 bottom-0 lg:relative flex w-full h-full justify-center z-[1] min-w-0',
              !channelId &&
                'translate-x-[100vw] min-[601px]:translate-x-[26.5rem] lg:translate-x-0'
            )}
          >
            <div className="relative flex flex-col items-center w-full h-full overflow-hidden border-l border-solid border-l-color-borders">
              <div className="chat-background absolute top-0 left-0 w-full h-full -z-10 overflow-hidden bg-theme-background"></div>
              {children}
            </div>
          </div>
        </div>
      </StreamVideo>
    </Chat>
  );
}
A lot is going on here, so let’s break things down:
Token Provider: We use a
tokenProviderfunction that fetches a token from a/api/tokenendpoint. This token tells the Stream services who the user is.Chat and Video Setup: Inside a
useEffect, we definesetUpChatAndVideoto connect the user to Stream’s chat client and the video client. We pull the user’s details from Clerk and pass them to both clients along with the token from our token provider.Sidebar Width Management: We store the sidebar’s width (
sidebarWidth) inlocalStorage. When the component mounts, we load and set that saved value so the sidebar always retains its user-defined width.Main Layout:
If we’re still loading the user or setting things up, we render a placeholder layout.
Once ready, we wrap everything in
<Chat>and<StreamVideo>components.The sidebar (left area) is one section, and the main content (right area) is where the chat lives, passed as children to the layout.
Creating the Token API Route
Next, let’s create the route for the /api/token endpoint we referenced earlier.
Create a /api/token directory in the app folder, then add a route.ts file with the following:
import { StreamClient } from '@stream-io/node-sdk';

const API_KEY = process.env.NEXT_PUBLIC_STREAM_API_KEY!;
const SECRET = process.env.STREAM_API_SECRET!;

export async function POST(request: Request) {
  const client = new StreamClient(API_KEY, SECRET);

  const body = await request.json();

  const userId = body?.userId;

  if (!userId) {
    return Response.error();
  }

  const token = client.generateUserToken({ user_id: userId });

  const response = {
    userId: userId,
    token: token,
  };

  return Response.json(response);
}
In the code above, we create and return an auth token for a user based on the provided userId.
Setting Up the Root Redirect and Channel Structure
In our Telegram clone, each chat will happen within a channel. In Stream, a channel contains:
Messages exchanged between users.
A list of people watching the channel (active participants).
An optional list of members (for private conversations).
Since every channel has a unique ID, our main entry point will be a /a/[channelId] route, where users interact with the chat. However, by default, visiting / doesn’t point to the main app page, so we need to handle that by redirecting users appropriately.
To set up the app’s routing structure, we’ll:
Redirect the root (
/) to/a.Create a placeholder page at
/ato keep the structure clean.Set up
/a/[channelId]where the actual chat will take place.
Redirecting the Root Page
Firstly, update the /app/page.tsx file with the following code:
import { redirect } from 'next/navigation';

export default function Home() {
  redirect('/a');
}
This ensures that when users visit /, they are automatically redirected to /a, where our channels will be handled.
Creating a Placeholder Page
Next, create a page.tsx file inside the /app/a/ directory and add the following code:
const Main = () => {
  return null;
};

export default Main;
This component doesn’t render anything; it simply serves as a placeholder to keep our routing structure clean.
Set Up the Channel Page
Now, let’s create the main chat page. Inside the /app/a/ directory, create a [channelId] folder and add a page.tsx file with the following code:
'use client';

import { useParams } from 'next/navigation';

const Chat = () => {
  const { channelId } = useParams<{ channelId: string }>();
  return <div>{channelId}</div>;
};

export default Chat;
This component extracts the channelId from the URL and displays it. Later, we’ll use this ID to load the correct chat data from Stream.

With this setup, our routing is now structured properly.
Displaying the List of Channels in the Sidebar
In this section, we’ll be adding a sidebar component to our app. The sidebar will allow users to view their active chats, search for conversations, and start new ones. To achieve this, we’ll use Stream’s ChannelList component and customize its style and functionality to fit our Telegram clone.
Creating the Chat Folders Component
The first component we’ll create for our sidebar is the ChatFolders component. This component will nest the ChannelList, a search bar, and Clerk’s profile menu for our app.
Inside the components directory, create a new file called ChatFolders.tsx and add the following code:
import { useRouter } from 'next/navigation';
import { useUser } from '@clerk/nextjs';
import {
  ChannelList,
  ChannelSearchProps,
  useChatContext,
} from 'stream-chat-react';

import ChatPreview from './ChatPreview';
import SearchBar from './SearchBar';
import Spinner from './Spinner';

const ChatFolders = ({}: ChannelSearchProps) => {
  const { user } = useUser();
  const { client } = useChatContext();
  const router = useRouter();

  return (
    <div className="flex-1 overflow-hidden relative w-full h-[calc(100%-3.5rem)]">
      <div className="flex flex-col w-full h-full overflow-hidden">
        <div className="flex-1 overflow-hidden relative w-full h-full">
          <div className="w-full h-full">
            <div className="custom-scroll p-2 overflow-y-scroll overflow-x-hidden h-full bg-background pe-2 min-[820px]:pe-[0px]">
              <ChannelList
                Preview={ChatPreview}
                sort={{
                  last_message_at: -1,
                }}
                filters={{
                  members: { $in: [client.userID!] },
                }}
                showChannelSearch
                additionalChannelSearchProps={{
                  searchForChannels: true,
                  onSelectResult: async (_, result) => {
                    if (result.cid) {
                      router.push(`/a/${result.id}`);
                    } else {
                      const channel = client.getChannelByMembers('messaging', {
                        members: [user!.id, result.id!],
                      });
                      await channel.create();
                      router.push(`/a/${channel.data?.id}`);
                    }
                  },
                  SearchBar: SearchBar,
                }}
                LoadingIndicator={() => (
                  <div className="w-full h-full flex items-center justify-center">
                    <div className="relative w-12 h-12">
                      <Spinner color="var(--color-primary)" />
                    </div>
                  </div>
                )}
              />
            </div>
          </div>
        </div>
      </div>
    </div>
  );
};

export default ChatFolders;
Let’s break down some of the component's key features:
User and Chat Context:
We pull in the current
userfrom Clerk usinguseUser().The
clientis retrieved fromuseChatContext(), which gives access to Stream’s chat functionalities.
Channel List & Search:
We use
ChannelListfrom Stream to display the user’s chat channels, sorted by the latest message.The filter ensures that only channels where the user is a member (
members: { $in: [client.userID!] }) are shown.The search bar (
SearchBar) will allow users to look for channels and other users.
Selecting or Creating a Chat:
If the search result is a channel (
cidexists), we navigate to it.Otherwise, if it’s a user, we create a new one-on-one chat with the user using
getChannelByMembersand then redirect the user to the new chat.
Loading Indicator: While loading, we display a centered
Spinnerinside the chat list area.
Next, we need to create the ChatPreview and Searchbar components we imported into our code.
Displaying Chat Previews
Each channel in the sidebar should show a preview containing the chat name, last message, timestamp, and unread count. We’ll handle this with the ChatPreview component.
Inside the components directory, create a new file called ChatPreview.tsx, and add the following code:
import { useCallback, useMemo } from 'react';
import { usePathname, useRouter } from 'next/navigation';
import {
  ChannelPreviewUIComponentProps,
  useChatContext,
} from 'stream-chat-react';
import clsx from 'clsx';

import Avatar from './Avatar';

const ChatPreview = ({
  channel,
  displayTitle,
  unread,
  displayImage,
  lastMessage,
}: ChannelPreviewUIComponentProps) => {
  const { client } = useChatContext();
  const router = useRouter();
  const pathname = usePathname();

  const isDMChannel = channel.id?.startsWith('!members');

  const goToChat = () => {
    const channelId = channel.id;
    router.push(`/a/${channelId}`);
  };

  const getDMUser = useCallback(() => {
    const members = { ...channel.state.members };
    delete members[client.userID!];
    return Object.values(members)[0].user!;
  }, [channel.state.members, client.userID]);

  const getChatName = useCallback(() => {
    if (displayTitle) return displayTitle;
    else {
      const member = getDMUser();
      return member.name || `${member.first_name} ${member.last_name}`;
    }
  }, [displayTitle, getDMUser]);

  const getImage = useCallback(() => {
    if (displayImage) return displayImage;
    else if (isDMChannel) {
      const member = getDMUser();
      return member.image;
    }
  }, [displayImage, getDMUser, isDMChannel]);

  const lastText = useMemo(() => {
    if (lastMessage) {
      return lastMessage.text;
    }

    if (isDMChannel) {
      return `${getChatName()} joined Telegram`;
    } else {
      return `${
        // @ts-expect-error one of these will be defined
        channel.data?.created_by?.first_name ||
        // @ts-expect-error one of these will be defined
        channel.data?.created_by?.name.split(' ')[0]
      } created the group "${displayTitle}"`;
    }
  }, [
    lastMessage,
    channel.data?.created_by,
    getChatName,
    displayTitle,
    isDMChannel,
  ]);

  const lastMessageDate = useMemo(() => {
    const date = new Date(
      lastMessage?.created_at || (channel.data?.created_at as string)
    );
    const today = new Date();
    if (
      date.getDate() === today.getDate() &&
      date.getMonth() === today.getMonth() &&
      date.getFullYear() === today.getFullYear()
    ) {
      return date.toLocaleTimeString('en-US', {
        hour: 'numeric',
        minute: 'numeric',
        hour12: false,
      });
    } else if (date.getFullYear() === today.getFullYear()) {
      return date.toLocaleDateString('en-US', {
        month: 'short',
        day: 'numeric',
      });
    } else {
      return date.toLocaleDateString('en-US', {
        month: 'short',
        day: 'numeric',
        year: 'numeric',
      });
    }
  }, [lastMessage, channel.data?.created_at]);

  const active = useMemo(() => {
    const pathChannelId = pathname.split('/').filter(Boolean).pop();
    return pathChannelId === channel.id;
  }, [pathname, channel.id]);

  return (
    <div
      className={clsx(
        'relative p-[.5625rem] cursor-pointer min-h-auto overflow-hidden flex items-center rounded-xl whitespace-nowrap gap-2',
        active && 'bg-chat-active text-white',
        !active && 'bg-background text-color-text hover:bg-chat-hover'
      )}
      onClick={goToChat}
    >
      <div className="relative">
        <Avatar
          data={{
            name: getChatName(),
            image: getImage(),
          }}
          width={54}
        />
      </div>
      <div className="flex-1 overflow-hidden">
        <div className="flex items-center justify-start overflow-hidden">
          <div className="flex items-center justify-start overflow-hidden gap-1">
            <h3 className="font-semibold truncate text-base">
              {getChatName()}
            </h3>
          </div>
          <div className="grow min-w-2" />
          <div className="flex items-center shrink-0 mr-[.1875rem] text-[.75rem]">
            <span className={active ? 'text-white' : 'text-color-text-meta'}>
              {lastMessageDate}
            </span>
          </div>
        </div>
        <div className="flex items-center justify-start truncate">
          <p
            className={clsx(
              'truncate text-[.9375rem] text-left pr-1 grow',
              active && 'text-white',
              !active && 'text-color-text-secondary'
            )}
          >
            {lastText}
          </p>
          {unread !== undefined && unread > 0 && (
            <div
              className={clsx(
                'min-w-6 h-6 shrink-0 rounded-xl text-sm leading-6 text-center py-0 px-[.4375rem] font-medium',
                active && 'bg-white text-primary',
                !active && 'bg-green text-white'
              )}
            >
              <span className="inline-flex whitespace-pre">{unread}</span>
            </div>
          )}
        </div>
      </div>
    </div>
  );
};

export default ChatPreview;
In the code above:
Fetching User & Chat Info:
The
useChatContext()hook provides the chat client (client).The
getDMUser()function determines the other participant in a direct message chat by excluding the current user from the members’ list.
Displaying Chat Details:
The
getChatName()function fetches the display name for group chats or the other participant’s name for one-on-one chats.The
getImage()function fetches the chat avatar.
Formatting the Last Message & Timestamp:
If a last message exists, it is displayed. Otherwise, a default system message (e.g., “User joined Telegram” or “Created the group”) is shown.
The
lastMessageDatefunction ensures the timestamp is formatted correctly:If the message is from today, it displays
HH:MM.If it’s from this year, it shows
Month & Date.Otherwise, it includes the year.
Navigating to Chats:
- When a user clicks on a chat, they are redirected to it using
router.push().
- When a user clicks on a chat, they are redirected to it using
Chat Highlighting:
If the current chat matches the URL path, the chat preview is highlighted to show it’s active.
If the chat has unread messages, a green badge with the count is displayed.
Adding a Search Bar
The search bar will allow users to search for chats and channels. It will also contain a profile menu for users.
Inside the components directory, create a new file called SearchBar.tsx, and add the following code:
import { UserButton, useUser } from '@clerk/nextjs';
import { SearchBarProps } from 'stream-chat-react';

import RippleButton from './RippleButton';

const SearchBar = ({ exitSearch, onSearch, query }: SearchBarProps) => {
  const { user } = useUser();

  const handleClick = () => {
    if (query) {
      exitSearch();
    }
  };

  return (
    <div className="flex items-center bg-background px-[.8125rem] pt-1.5 pb-2 gap-[.625rem] h-[56px]">
      <div className="relative h-10 w-10 [&>div:first-child]">
        <div className="[&>div]:opacity-0">
          {user && !query && <UserButton />}
        </div>
        <div className="absolute left-0 top-0 flex items-center justify-center pointer-events-none">
          <RippleButton
            onClick={handleClick}
            icon={query ? 'arrow-left' : 'menu'}
          />
        </div>
      </div>
      <div className="relative w-full bg-chat-hover text-[rgba(var(--color-text-secondary-rgb),0.5)] max-w-[calc(100%-3.25rem)] border-[2px] border-chat-hover has-[:focus]:border-primary has-[:focus]:bg-background rounded-[1.375rem] flex items-center pe-[.1875rem] transition-opacity ease-[cubic-bezier(0.33,1,0.68,1)] duration-[330ms]">
        <input
          type="text"
          name="Search"
          value={query}
          onChange={onSearch}
          placeholder="Search"
          autoComplete="off"
          className="peer order-2 h-10 text-black rounded-[1.375rem] bg-transparent pl-[11px] pt-[6px] pb-[7px] pr-[9px] focus:outline-none focus:caret-primary"
        />
        <div className="w-6 h-6 ms-3 shrink-0 flex items-center justify-center peer-focus:text-primary">
          <i className="icon icon-search text-2xl leading-[1]" />
        </div>
      </div>
    </div>
  );
};

export default SearchBar;
Let’s break down this component:
User Display & Menu Button:
If a user is logged in and there’s no search query, a Clerk UserButton is displayed.
A
RippleButtondynamically toggles between a menu icon and a back arrow depending on the search state.
Search Handling & Dynamic Styling:
When the user types,
onSearchupdates the query and filters the results.Clicking the back arrow clears the search (
exitSearch()).
Creating the Sidebar Component
With all the subcomponents ready, let’s put them all together in our sidebar.
Create a Sidebar.tsx file in the components directory and add the following code:
'use client';
import React, { useState, useEffect, RefObject } from 'react';
import clsx from 'clsx';

import Button from './Button';
import ChatFolders from './ChatFolders';
import { minWidth, defaultMaxWidth } from '@/app/a/layout';
import useClickOutside from '@/hooks/useClickOutside';

enum SidebarView {
  Default,
  NewGroup,
}

interface SidebarProps {
  width: number;
  setWidth: React.Dispatch<React.SetStateAction<number>>;
}

export default function Sidebar({ width, setWidth }: SidebarProps) {
  const getMaxWidth = () => {
    const windowWidth = window.innerWidth;
    let newMaxWidth = defaultMaxWidth;

    if (windowWidth >= 1276) {
      newMaxWidth = Math.floor(windowWidth * 0.33);
    } else if (windowWidth >= 926) {
      newMaxWidth = Math.floor(windowWidth * 0.4);
    }
    return newMaxWidth;
  };

  const [maxWidth, setMaxWidth] = useState(getMaxWidth());
  const [menuOpen, setMenuOpen] = useState(false);
  const [view, setView] = useState(SidebarView.Default);

  const menuDomNode = useClickOutside(() => {
    setMenuOpen(false);
  }) as RefObject<HTMLDivElement>;

  const toggleMenu = () => {
    setMenuOpen((prev) => !prev);
  };

  const openNewGroupView = () => {
    setView(SidebarView.NewGroup);
    setMenuOpen(false);
  };

  useEffect(() => {
    const calculateMaxWidth = () => {
      const newMaxWidth = getMaxWidth();
      setMaxWidth(newMaxWidth);
      setWidth(width >= newMaxWidth ? newMaxWidth : width);
    };

    calculateMaxWidth();

    window.addEventListener('resize', calculateMaxWidth);

    return () => {
      window.removeEventListener('resize', calculateMaxWidth);
    };
  }, [setWidth, width]);

  useEffect(() => {
    if (width) {
      let newWidth = width;
      if (width > maxWidth) {
        newWidth = maxWidth;
      }
      setWidth(newWidth);
      localStorage.setItem('sidebarWidth', String(width));
    }
  }, [width, maxWidth, setWidth]);

  // Handler for resizing the sidebar
  const handleResize = (
    event: React.MouseEvent<HTMLDivElement, MouseEvent>
  ) => {
    const startX = event.clientX;
    const startWidth = width;

    const onMouseMove = (e: MouseEvent) => {
      const newWidth = Math.min(
        Math.max(minWidth, startWidth + (e.clientX - startX)),
        maxWidth
      );
      setWidth(newWidth);
    };

    const onMouseUp = () => {
      window.removeEventListener('mousemove', onMouseMove);
      window.removeEventListener('mouseup', onMouseUp);
    };

    window.addEventListener('mousemove', onMouseMove);
    window.addEventListener('mouseup', onMouseUp);
  };

  return (
    <div
      id="sidebar"
      style={{ width: `${width}px` }}
      className="max-[600px]:!w-full max-[925px]:!w-[26.5rem] w-auto group bg-background h-full flex-shrink-0 relative"
      onMouseLeave={() => setMenuOpen(false)}
    >
      {/* Default View */}
      <div
        className={clsx(
          'contents',
          view === SidebarView.Default ? 'block' : 'hidden'
        )}
      >
        <ChatFolders />
      </div>
      {/* New Chat Button */}
      <div
        className={clsx(
          'absolute right-4 bottom-4 translate-y-20 transition-transform duration-[.25s] ease-[cubic-bezier(0.34,1.56,0.64,1)] group-hover:translate-y-0',
          menuOpen && 'translate-y-0',
          view === SidebarView.NewGroup && 'hidden'
        )}
      >
        <Button
          active
          icon="new-chat-filled"
          onClick={toggleMenu}
          className={clsx('sidebar-button', menuOpen ? 'active' : '')}
        >
          <i className="absolute icon icon-close" />
        </Button>
        <div>
          {menuOpen && (
            <div className="fixed left-[-100vw] right-[-100vw] top-[-100vh] bottom-[-100vh] z-20" />
          )}
          <div
            ref={menuDomNode}
            className={clsx(
              'bg-background-compact-menu backdrop-blur-[10px] custom-scroll py-1 bottom-[calc(100%+0.5rem)] right-0 origin-bottom-right overflow-hiddden list-none absolute shadow-[0_.25rem_.5rem_.125rem_#72727240] rounded-xl min-w-[13.5rem] z-[21] overscroll-contain text-black transition-[opacity,_transform] duration-150 ease-[cubic-bezier(0.2,0.0.2,1)]',
              menuOpen
                ? 'block opacity-100 scale-100'
                : 'hidden opacity-0 scale-[.85]'
            )}
          >
            <div
              onClick={openNewGroupView}
              className="text-sm my-[.125rem] mx-1 p-1 pe-3 rounded-md font-medium scale-100 transition-transform duration-150 ease-in-out bg-transparent flex items-center relative overflow-hidden leading-6 whitespace-nowrap text-black cursor-pointer"
            >
              <i
                className="icon icon-group max-w-5 text-[1.25rem] me-5 ms-2 text-[#707579]"
                aria-hidden="true"
              />
              {'New Group'}
            </div>
          </div>
        </div>
      </div>
      {/* Resize Handle */}
      <div
        className="hidden lg:block absolute z-20 top-0 -right-1 h-full w-2 cursor-ew-resize"
        onMouseDown={handleResize}
      />
    </div>
  );
}
In the component above:
Sidebar Width Management:
The sidebar width is dynamically calculated based on the window size and adjusted within a defined range (
minWidthtomaxWidth).The width is stored in localStorage to persist between sessions.
Resizable Sidebar:
A resize handle (
cursor-ew-resize) allows users to drag to resize the sidebar.The
handleResizefunction ensures the width stays within the allowed limits while dragging.
Sidebar Views:
The sidebar has two modes:
Default View – Displays the chat list (
ChatFolders).New Group View – Opens when the user clicks "New Group."
Menu Toggle & Click Outside Handling:
Clicking the "New Chat" button toggles a floating menu.
If the user clicks outside, the menu automatically closes (
useClickOutside()).
Adding Sidebar Styles
Next, let’s style our sidebar to ensure it blends well with the rest of the chat UI.
Open the globals.scss file in the app directory and add the following CSS:
...
#sidebar .str-chat.messaging.light.str-chat__channel-list.str-chat__channel-list-react {
  background: none;
  border: none;
  box-shadow: none;
}

#sidebar .str-chat.messaging.light.str-chat__channel-list.str-chat__channel-list-react>div {
  padding: 0;
}

#sidebar .str-chat__channel-search {
  position: absolute;
  width: 100%;
  top: 0;
  left: 0;
}

#sidebar .str-chat__channel-list-react .str-chat__channel-list-messenger-react {
  margin-top: 56px;
}

#sidebar .str-chat__channel-search-result-list.inline {
  padding: 0.5rem;
}

#sidebar .str-chat__channel-search-result {
  border-radius: 0.75rem;
}
...
Adding the Sidebar to the Layout
Finally, let’s add the sidebar to our app’s layout.
Open /a/layout.tsx and update the file with the following:
...
import Sidebar from '@/components/Sidebar';
...

export default function Layout({ children }: LayoutProps) {
  ...
  return (
    <Chat client={chatClient!}>
      <StreamVideo client={videoClient!}>
        <div className="flex h-full w-full">
          <Sidebar width={sidebarWidth} setWidth={setSidebarWidth} />
          ...
        </div>
      </StreamVideo>
    </Chat>
  );
}
Here, we import the Sidebar component, add it to our layout, and provide the values for its width and setWidth props so it can be resized dynamically.

Setting Up Group Chat Creation in the Sidebar
With our sidebar in place, the next step is to add the ability to create group chats. We’ll do this by creating a view in the sidebar that allows the user to:
Give the group chat a name
Fetch and select available users on the app
Create a new chat channel with the selected users as members
Inside the components directory, create a new file called NewGroupView.tsx and add the following code:
import { ChangeEvent, useEffect, useMemo, useRef, useState } from 'react';
import { DefaultStreamChatGenerics, useChatContext } from 'stream-chat-react';
import { UserResponse } from 'stream-chat';
import Avatar from './Avatar';
import Button from './Button';
import RippleButton from './RippleButton';
import Spinner from './Spinner';
import { customAlphabet } from 'nanoid';
import { getLastSeen } from '../lib/utils';
import clsx from 'clsx';
interface NewGroupViewProps {
goBack: () => void;
}
const NewGroupView = ({ goBack }: NewGroupViewProps) => {
const { client } = useChatContext();
const [creatingGroup, setCreatingGroup] = useState(false);
const [query, setQuery] = useState('');
const [groupName, setGroupName] = useState('');
const [users, setUsers] = useState<UserResponse<DefaultStreamChatGenerics>[]>(
[]
);
const [originalUsers, setOriginalUsers] = useState<
UserResponse<DefaultStreamChatGenerics>[]
>([]);
const [selectedUsers, setSelectedUsers] = useState<string[]>([]);
const debounceTimeout = useRef<NodeJS.Timeout | null>(null);
const cancelled = useRef(false);
useEffect(() => {
const getAllUsers = async () => {
const userId = client.userID;
const { users } = await client.queryUsers(
// @ts-expect-error - id
{ id: { $ne: userId } },
{ id: 1, name: 1 },
{ limit: 20 }
);
setUsers(users);
setOriginalUsers(users);
};
getAllUsers();
// eslint-disable-next-line react-hooks/exhaustive-deps
}, []);
const handleUserSearch = async (e: ChangeEvent<HTMLInputElement>) => {
const query = e.target.value.trim();
setQuery(query);
if (!query) {
if (debounceTimeout.current) clearTimeout(debounceTimeout.current);
cancelled.current = true;
setUsers(originalUsers);
return;
}
cancelled.current = false;
if (debounceTimeout.current) clearTimeout(debounceTimeout.current);
debounceTimeout.current = setTimeout(async () => {
if (cancelled.current) return;
try {
const userId = client.userID;
const { users } = await client.queryUsers(
{
$or: [
{ id: { $autocomplete: query } },
{ name: { $autocomplete: query } },
],
// @ts-expect-error - id
id: { $ne: userId },
},
{ id: 1, name: 1 },
{ limit: 5 }
);
if (!cancelled.current) setUsers(users);
} catch (error) {
console.error('Error fetching users:', error);
}
}, 200);
};
const leave = () => {
setCreatingGroup(false);
setGroupName('');
setQuery('');
setSelectedUsers([]);
goBack();
};
const createNewGroup = async () => {
if (!groupName) {
alert('Please enter a group name.');
return;
}
if (selectedUsers.length < 2) {
alert('Please select at least two users.');
return;
}
setCreatingGroup(true);
try {
const alphabet = 'ABCDEFGHIJKLMNOPQRSTUVWXYZ1234567890';
const nanoid = customAlphabet(alphabet, 7);
const group = client.channel('messaging', nanoid(7), {
name: groupName,
members: [...selectedUsers, client.userID!],
});
await group.create();
leave();
} catch (error) {
console.error(error);
alert('Error creating group');
} finally {
setCreatingGroup(false);
}
};
const onSelectUser = (e: ChangeEvent<HTMLInputElement>) => {
const userId = e.target.id;
setSelectedUsers((prevSelectedUsers) => {
if (prevSelectedUsers.includes(userId)) {
return prevSelectedUsers.filter((id) => id !== userId);
} else {
return [...prevSelectedUsers, userId];
}
});
};
const sortedUsers = useMemo(
() =>
users.sort((a, b) => {
if (selectedUsers.includes(a.id)) {
return -1;
} else if (selectedUsers.includes(b.id)) {
return 1;
} else {
return 0;
}
}),
[users, selectedUsers]
);
return (
<>
<div className="flex items-center bg-background px-[.8125rem] pt-1.5 pb-2 gap-[1.375rem] h-[56px]">
<RippleButton onClick={leave} icon="arrow-left" />
<h3 className="text-[1.25rem] font-medium mr-auto select-none truncate">
New Group
</h3>
</div>
<div className="flex flex-col px-5 h-[calc(100%-3.5rem)] overflow-hidden">
<div>
<label
htmlFor="groupName"
className="relative block mt-5 py-[11px] px-[18px] rounded-xl border border-color-borders-input shadow-sm focus-within:border-primary focus-within:ring-1 focus-within:ring-primary"
>
<input
type="text"
id="groupName"
value={groupName}
onChange={(e) => setGroupName(e.target.value)}
className="peer caret-primary border-none bg-transparent placeholder-transparent placeholder:text-base focus:border-transparent focus:outline-none focus:ring-0"
placeholder="Group name"
/>
<span className="pointer-events-none absolute start-[18px] top-0 -translate-y-1/2 bg-white p-0.5 text-sm text-[#a2acb4] transition-all peer-placeholder-shown:top-1/2 peer-placeholder-shown:text-base peer-focus:top-0 peer-focus:text-xs peer-focus:text-primary">
Group name
</span>
</label>
<h3 className="my-4 mx-1 font-medium text-[1rem] text-color-text-secondary">
Add members
</h3>
<label
htmlFor="user"
className="relative caret-primary block overflow-hidden border-b border-color-borders-input bg-transparent py-3 px-5 focus-within:border-primary"
>
<input
type="text"
id="users"
placeholder="Who would you like to add?"
value={query}
onChange={(e) => handleUserSearch(e)}
className="text-base h-8 w-full border-none bg-transparent p-0 placeholder:text-base focus:border-transparent focus:outline-none focus:ring-0"
/>
</label>
<fieldset className="flex flex-col gap-2 mt-2 custom-scroll">
{sortedUsers.map((user) => (
<UserCheckbox
key={user.id}
user={user}
checked={selectedUsers.includes(user.id)}
onChange={onSelectUser}
/>
))}
</fieldset>
</div>
</div>
<div className="absolute right-4 bottom-4 transition-transform duration-[.25s] ease-[cubic-bezier(0.34,1.56,0.64,1)] translate-y-0">
<Button
active
icon="arrow-right"
onClick={createNewGroup}
disabled={creatingGroup}
className={clsx('sidebar-button', creatingGroup ? 'active' : '')}
>
<div className="icon-loading absolute">
<div className="relative w-6 h-6 before:relative before:content-none before:block before:pt-full">
<Spinner />
</div>
</div>
</Button>
</div>
</>
);
};
interface UserCheckboxProps {
user: UserResponse<DefaultStreamChatGenerics>;
checked: boolean;
onChange: (e: ChangeEvent<HTMLInputElement>) => void;
}
const UserCheckbox = ({ user, checked, onChange }: UserCheckboxProps) => {
return (
<label
htmlFor={user.id}
className="flex items-center gap-2 p-2 h-[3.5rem] rounded-xl hover:bg-chat-hover bg-background-compact-menu cursor-pointer"
>
<div className="relative h-10 w-10">
<Avatar
data={{
name: user.name || `${user.first_name} ${user.last_name}`,
image: user.image || '',
}}
width={40}
/>
</div>
<div>
<p className="text-base leading-5">
{user.name || `${user.first_name} ${user.last_name}`}
</p>
<p className="text-sm text-color-text-meta">
{getLastSeen(user.last_active!)}
</p>
</div>
<div className="flex items-center ml-auto">
​
<input
id={user.id}
type="checkbox"
checked={checked}
onChange={onChange}
className="size-4 rounded border-2 border-color-borders-input"
/>
</div>
</label>
);
};
export default NewGroupView;
Let’s go over some of the main features of this component:
Fetching Users:
The component retrieves a list of users (excluding the current user) using
client.queryUsers().The list is stored in
usersandoriginalUsersto allow filtering while searching.
Searching for Users:
The
handleUserSearchfunction filters users dynamically based on input.A debounce mechanism prevents excessive API calls.
Group Creation Workflow:
The user selects members using checkboxes.
A group name must be provided before proceeding.
When creating a group, a random ID is generated using
nanoid(), and a new chat channel is created.
UI & Interaction:
Input fields: Group name input and user search bar with dynamic labels.
Member selection: Users are sorted to prioritize selected members at the top.
Button states:
The "Create" button disables when a group is being created.
A spinner appears while loading.
Going Back & Resetting State:
- Clicking the back button resets the form and clears the selected users.
Next, let’s add the NewGroupView component to the sidebar so that users can access the group creation feature.
Navigate to /components/Sidebar.tsx and modify the file to include NewGroupView:
...
import NewGroupView from './NewGroupView';
...

export default function Sidebar({ width, setWidth }: SidebarProps) {
  ...

  return (
    <div
      id="sidebar"
      ...
    >
      {/* Default View */}
      ...
      {/* New Group View */}
      <div
        className={clsx(
          'contents',
          view === SidebarView.NewGroup ? 'block' : 'hidden'
        )}
      >
        <NewGroupView goBack={() => setView(SidebarView.Default)} />
      </div>
      {/* New Chat Button */}
      ...
      {/* Resize Handle */}
      ...
    </div>
  );
}
In this update, we import NewGroupView and conditionally render it inside the sidebar. If the user clicks “New Group”, the sidebar switches to NewGroupView. When the group is created (or the user cancels), the sidebar returns to the default view.

And that’s it! With this update, users can now create new groups within the sidebar.
Conclusion
In this first part of the series, we’ve laid the foundation for our Telegram Web clone by setting up the Next.js project, integrating Clerk for authentication, and building the initial layout with TailwindCSS. We also configured the Stream SDKs and added the ability to create group chats.
In Part 2, we’ll build the chat interface and implement real-time messaging using the Stream React Chat SDK.
Stay tuned!


